Site Variable Setup
Note: This section only has to be set up once per site
If you’ve already done it in Mac, Windows, or Linux, you don't have to do it again.
- If you haven’t added all of your companies to Lavawall® yet, you can do so under Client Orgs and Add.

Note: This is only required for MSP and Audit accounts. Individual accounts do not need to add client accounts
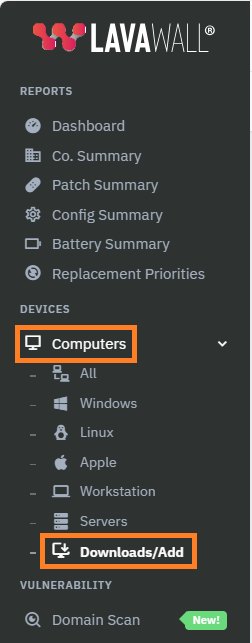
- In the Lavawall® console, expand Computers and click Downloads/Add
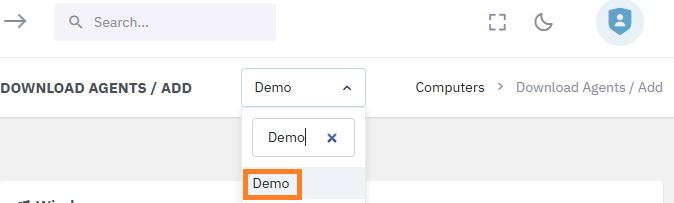
- In the middle of the top bar, select the first company you want to Add
- Scroll down to the Datto RMM for Windows section and look for the red code under step 7.

- Copy that code
- Log into Datto RMM in a different tab or Window
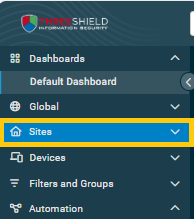
- In the left side menu in Datto RMM, Expand Sites
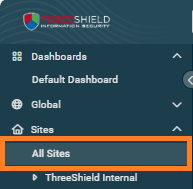
- Click All Sites
- Click the site you want to deploy to first
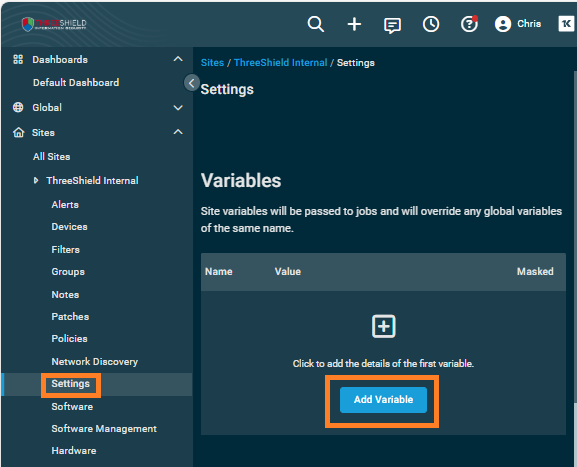
- Under that site in the left menu, click Settings
- Under Variables, click Add Variable
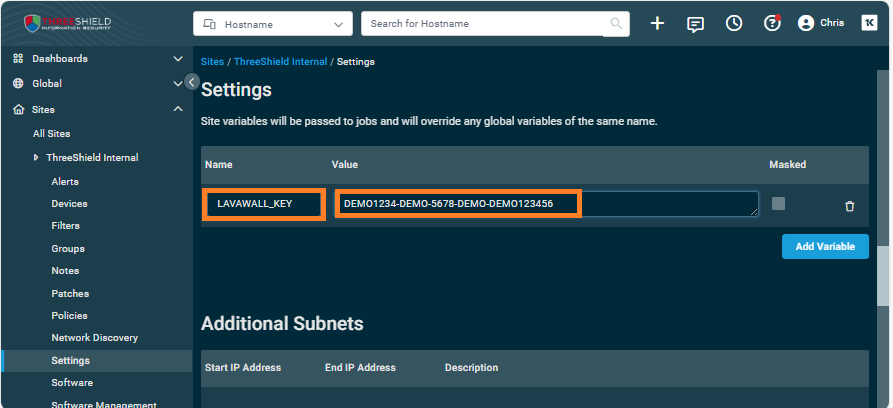
- For Value, paste the code you copied above
- For Name, enter
LAVAWALL_KEY - Click Add Variable
- Scroll down and click Save Site

- Repeat the above steps for all of your sites, selecting the appropriate company from the drop-down menu above.
Windows agent Datto RMM deployment
Note: If you haven’t set up company variables, please follow the site variable instructions at the top of this page.- Click the following button and save the Datto RMM Lavawall® for Windows installation component
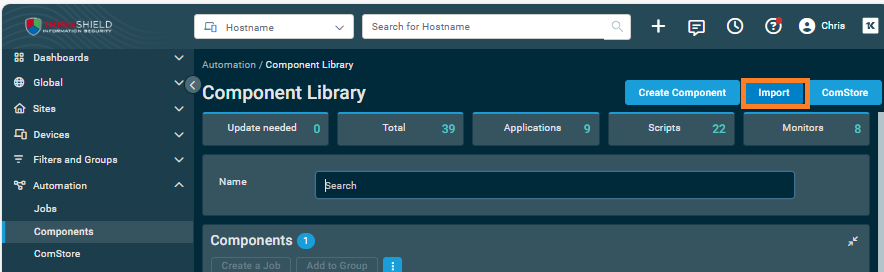
- Back in the Datto RMM, click Automation on the left-side menu, then click Components
- Near the top right corner, click Import
- Open the component file you downloaded from Lavawall®.

- Scroll down and click Save Component
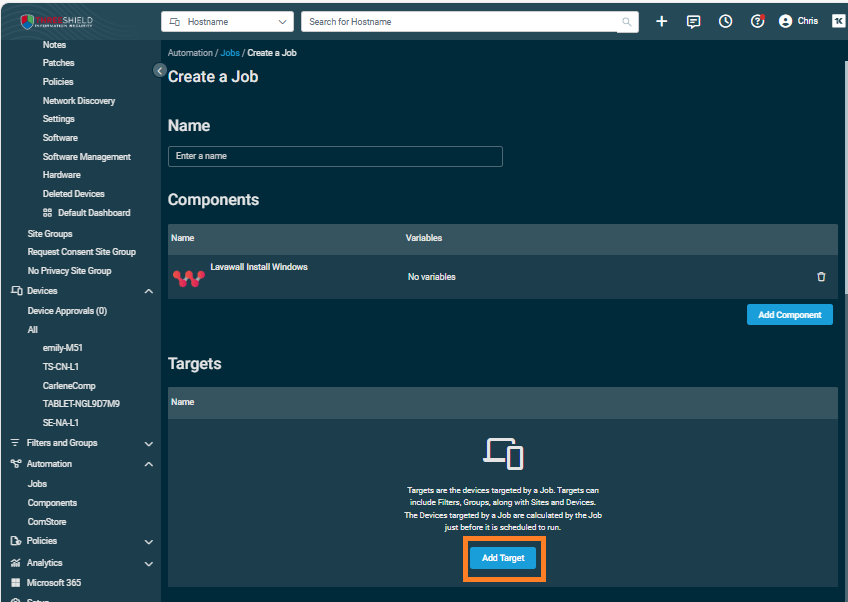
- Create a job to deploy Lavawall®. To do an initial deployment:
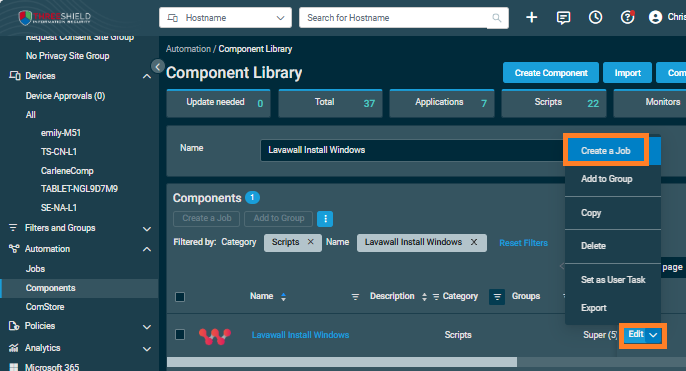
Go to Automation then Components and search for Lavawall Install Windows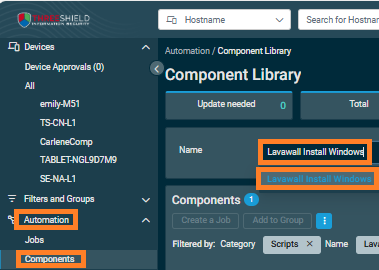
- Click the drop-down menu beside Edit on the right side and click Create a Job
- Click Add Target
- Search for the device or filter you want to add. For all Windows, search for Windows and add All Windows Desktops and All Windows Servers by clicking the Add button beside these
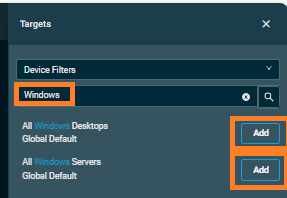
Note: Only select all if you have set the code for each company. Otherwise you might want to use the Device target search. - Click the X at the top of the Targets pane
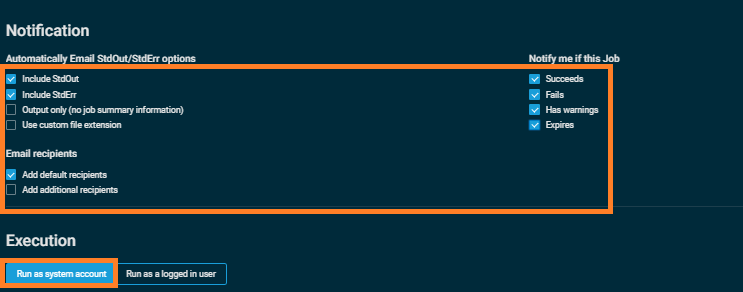
- Scroll down and select the notifications you want before clicking Run as system account.

Note: Lavawall cannot be installed in the Windows Sandbox or debuggers. These platforms do not support resident services and other requirements. By blocking these platforms, we also avoid having non-existent instances added when Defender for Office 365* scans links in Azure whenever the download link is sent via email.
*Yes, we know it's now called Microsoft 365; however, the Defender product that checks for links and phishing is still called Defender for Office 365.
Mac agent Datto RMM deployment
Note: If you haven’t set up company variables, please follow the site variable instructions at the top of this page.- Click the following button and save the Datto RMM Lavawall® for Mac installation component
- Back in the Datto RMM, click Automation on the left-side menu, then click Components
- Near the top right corner, click Import
- Open the component file you downloaded from Lavawall®.

- Scroll down and click Save Component
- Create a job to deploy Lavawall®. To do an initial deployment:
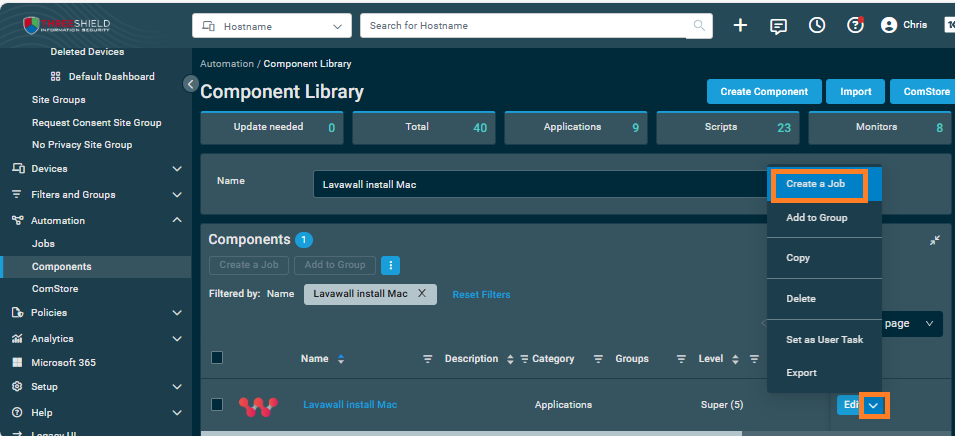
Go to Automation then Components and search for Lavawall Install Mac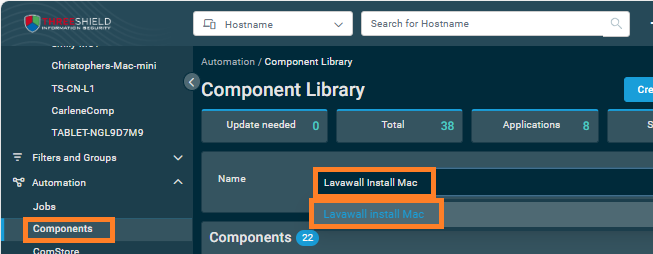
- Click the drop-down menu beside Edit on the right side and click Create a Job
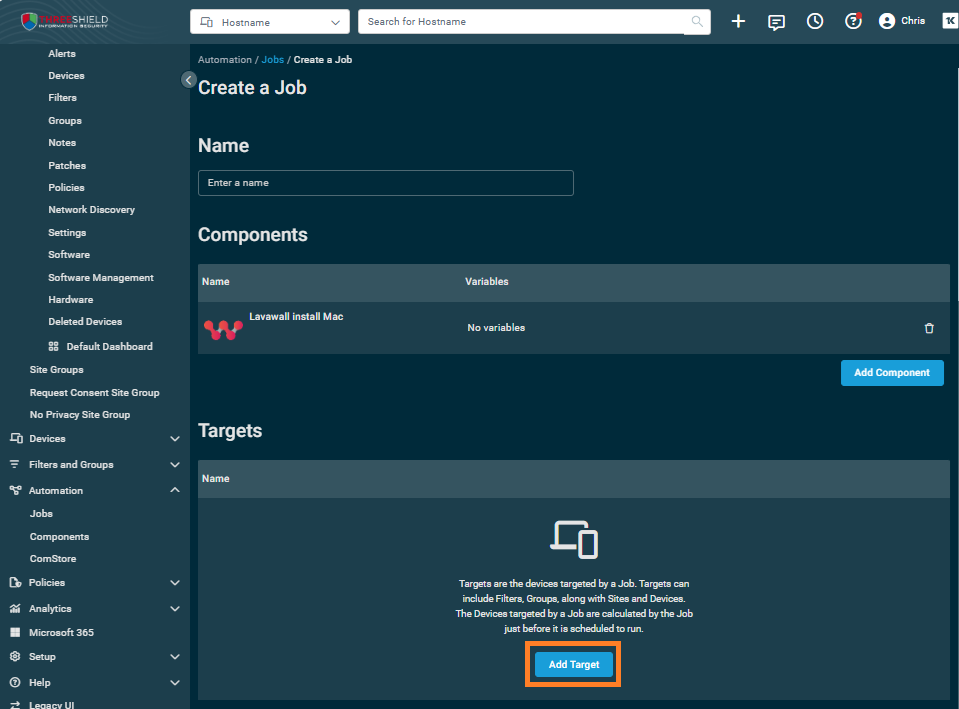
- Click Add Target
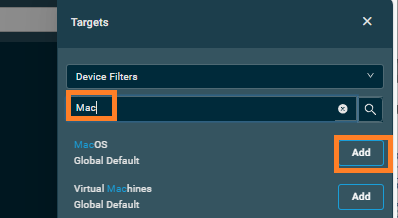
- Search for the device or filter you want to add. For all Macs, search for Mac and add MacOS by clicking the Add button beside these
Note: Only select all if you have set the code for each company. Otherwise you might want to use the Device target search. - Click the X at the top of the Targets pane
- Scroll down and select the notifications you want before clicking Run as system account.
Note: Lavawall cannot be installed in the Windows Sandbox or debuggers. These platforms do not support resident services and other requirements. By blocking these platforms, we also avoid having non-existent instances added when Defender for Office 365* scans links in Azure whenever the download link is sent via email.
*Yes, we know it's now called Microsoft 365; however, the Defender product that checks for links and phishing is still called Defender for Office 365.
Deploy Datto RMM from Lavawall®
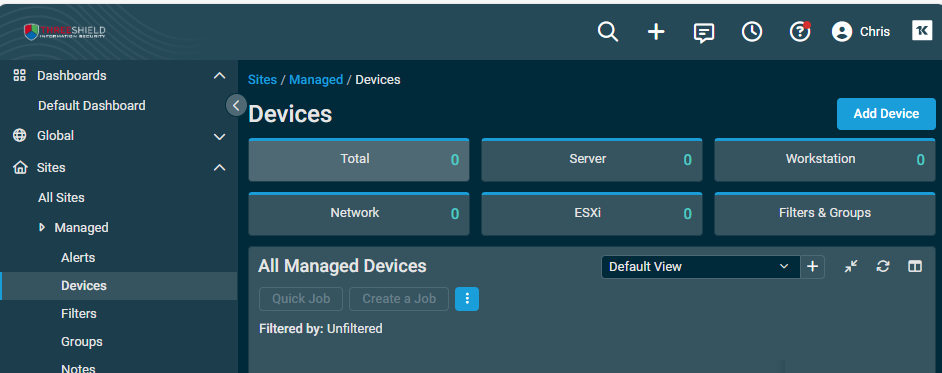
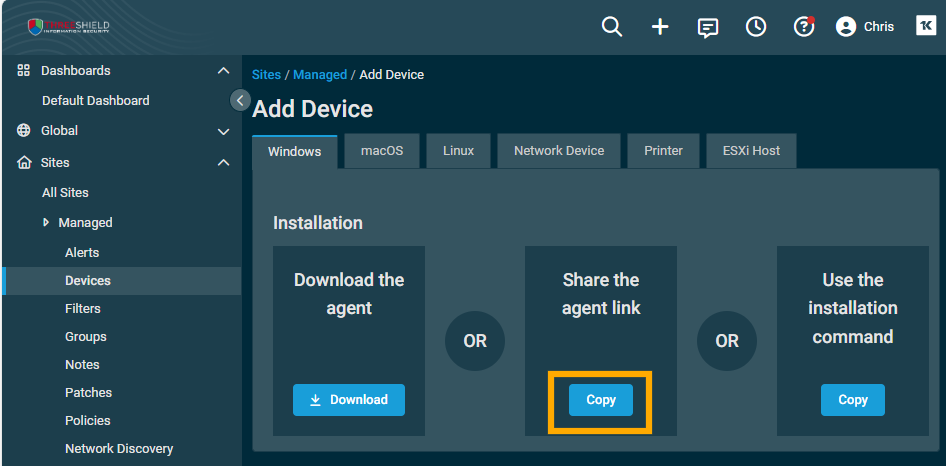
You can deploy Datto RMM from Lavawall® with one click after copying the Datto Key.- In Datto RMM, select Devices under the site you want to add to Lavawall® and click Add Device
- Click Copy under Share the agent link
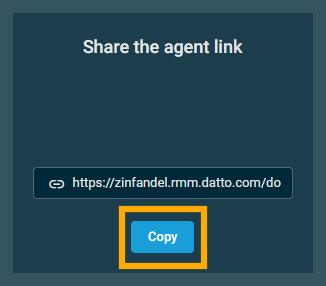
- Paste it somewhere and just copy the GUID after windows/

- On Lavawall’s side menu, scroll down to CLOUD/SAAS and click Datto RMM
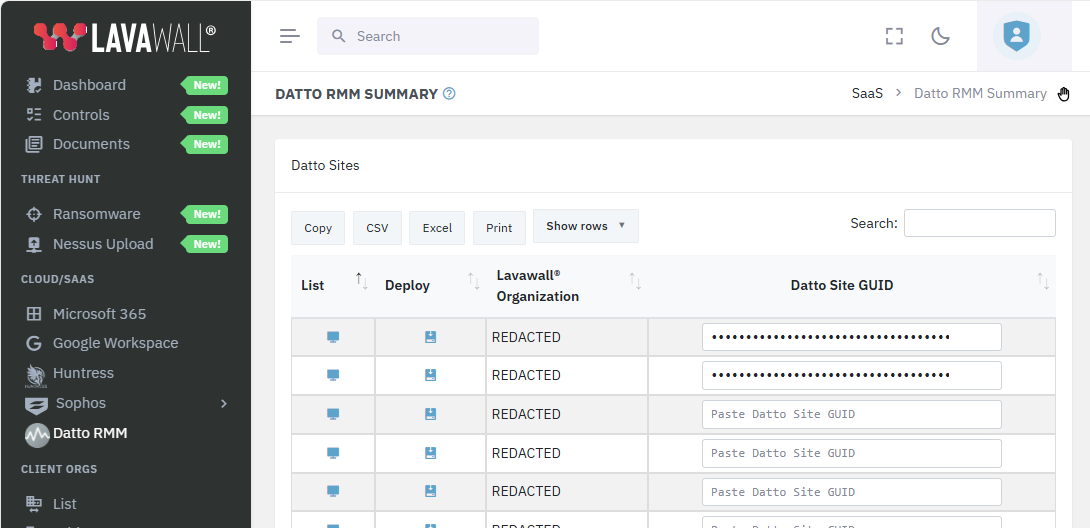
- Paste the GUID in the Datto Site GUID Column for the company you want to set up, then click the green checkmark in the textbox to save it.